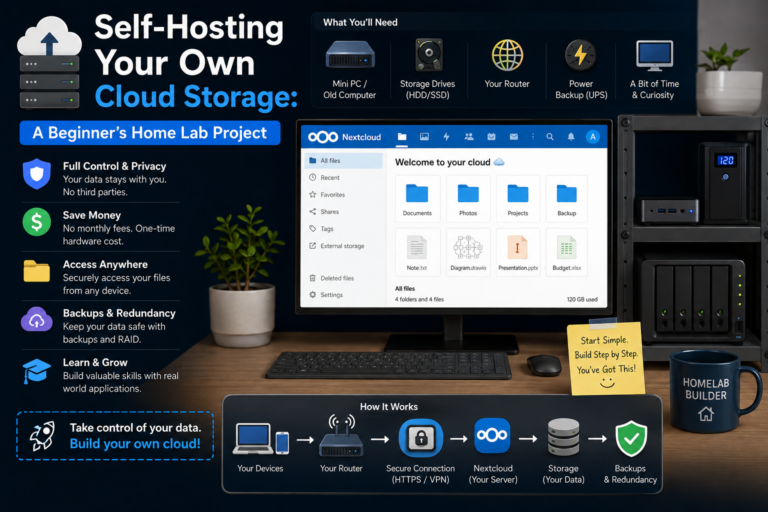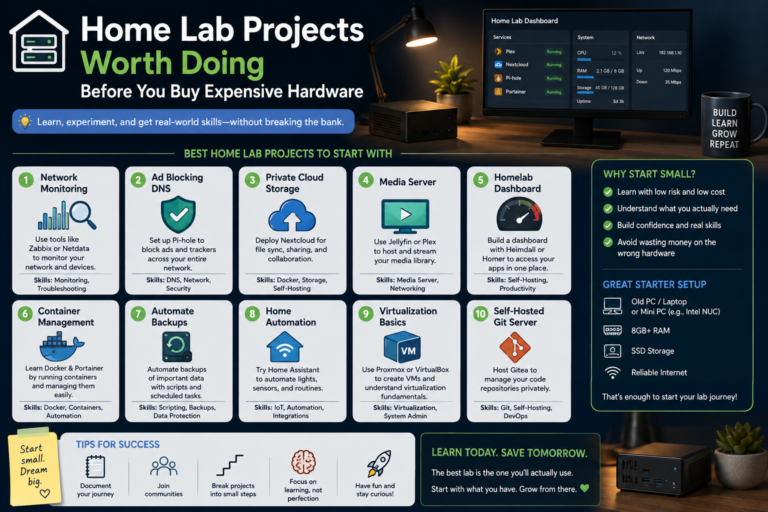
The homelab hobby is notoriously prone to the “gear trap.” Browsing online homelab forums makes it easy to convince yourself that building a functional self-hosted environment requires a enterprise-grade server rack, enterprise SAS drives, and 10GbE networking equipment.
In reality, throwing expensive hardware at a nascent homelab often leads to over-engineered setups, high electricity bills, and abandoned projects.
Before investing thousands of dollars in server gear, there is immense value in mastering foundational networking, virtualization, and service deployment on hardware you already own—an old laptop, an unused desktop PC, or a cheap mini PC.
Here is a breakdown of essential homelab projects worth completing on zero-budget or bargain hardware before upgrading your rig.
1. Build a DNS-Level Ad and Tracker Blocker (Pi-hole or AdGuard Home)
Setting up network-wide ad blocking is the single best gateway project for homelabbing. It introduces core networking concepts without taxing your hardware.
┌─────────────────┐ ┌─────────────────┐ ┌─────────────────┐
│ Client Device │ ────► │ Pi-hole/AdGuard│ ────► │ Upstream DNS │
│ (Phone/Laptop) │ │ (DNS Filter) │ │ (Cloudflare/Google)
└─────────────────┘ └─────────────────┘ └─────────────────┘
What You Learn:
- Local Networking & DNS: Understanding how domain resolution works across your home network.
- Static IP Assignment: Configuring router DHCP reservations to pin services to dedicated addresses.
- Upstream DNS Configuration: Setting up encrypted DNS protocols (DoH/DoT) for enhanced privacy.
Hardware Needed:
Virtually anything. A Raspberry Pi 3/4, an old 32-bit laptop, or a lightweight Docker container on any desktop PC.
2. Deploy Containerized Services with Docker & Docker Compose
Before diving into complex hypervisors like Proxmox VE or VMware ESXi, master lightweight containerization. Running Docker directly on a basic Linux installation (such as Ubuntu Server or Debian) teaches service isolation without the overhead of heavy virtual machines.
Recommended Starter Stack:
- Portainer: A visual GUI dashboard to manage your containers, images, and networks.
- Uptime Kuma: A monitoring tool to track service uptime and receive alerts when local services go down.
- Nginx Proxy Manager: A reverse proxy to map internal ports (e.g.,
192.168.1.50:8080) to clean local domain names (e.g.,pihole.local) with automated SSL management.
What You Learn:
- Container Lifecycle: Image pulling, persistent volume mounting, and environment variables.
- Declarative Infrastructure: Writing reusable
docker-compose.ymlfiles to deploy multi-container stacks in seconds. - Port Mapping & Conflicts: Managing internal vs. host networking interfaces.
3. Set Up Remote Access via Zero-Trust Mesh VPNs (Tailscale or Netmaker)
Opening ports on your home router (port forwarding) exposes your local network to public internet scans and malicious automated bots. A modern homelab solution relies on zero-trust mesh networks like Tailscale (built on WireGuard).
What You Learn:
- Secure Remote Access: Accessing your home server’s local IP addresses from anywhere in the world on a mobile phone or laptop.
- Subnet Routing: Routing traffic through your homelab machine so external devices benefit from your home Pi-hole DNS setup.
- Network Security Fundamentals: Avoiding dangerous public port exposures while preserving seamless remote access.
4. Configure Automated Local & Offsite Backups (3-2-1 Strategy)
Storing files on a shiny RAID array of hard drives is not a substitute for a true backup strategy. Learning data redundancy on basic storage prepares you to manage large enterprise volumes safely later on.
The 3-2-1 Rule to Practice:
- 3 total copies of your important data.
- 2 different storage media types (e.g., internal SSD + external USB hard drive).
- 1 copy stored offsite (e.g., encrypted cloud bucket via Rclone or BorgBackup).
┌───────────────────────────────────────────────────────────┐
│ THE 3-2-1 BACKUP RULE │
├──────────────────────────────┬────────────────────────────┤
│ 3 Copies of Data │ Original + 2 Backups │
│ 2 Different Media Types │ Internal SSD + External HD │
│ 1 Offsite Location │ Encrypted Cloud Storage │
└──────────────────────────────┴────────────────────────────┘
What You Learn:
- Backup Automation: Setting up
cronjobs and CLI backup routines using tools like Borg, Restic, or Rclone. - Data Encryption: Encrypting data streams before sending them to public cloud storage tiers.
- Disaster Recovery: Practicing full system restores to ensure your backups actually work when disaster strikes.
5. Run a Lightweight Bare-Metal Hypervisor (Proxmox VE)
Once comfortable with bare-metal Linux and Docker, install Proxmox Virtual Environment (PVE) on an old desktop or mini PC. Proxmox allows you to run full Virtual Machines (VMs) alongside lightweight Linux Containers (LXCs) on a single physical host.
What You Learn:
- Hypervisor Administration: Resource allocation (vCPUs, RAM limits, virtual disk creation).
- LXC vs. Full VM Performance: Learning when to spin up a lightweight container (low overhead) versus a full virtual machine (isolated OS kernel).
- Snapshot Management: Taking instant system state snapshots before running major system updates, allowing 1-click rollbacks if something breaks.
Hardware Readiness Checklist: When Should You Finally Upgrade?
Before spending money on rackmount servers, 10GbE switches, or enterprise NAS units, evaluate your current setup against this checklist:
| Upgrade Driver | Don’t Buy Yet If… | Upgrade Hardware When… |
|---|---|---|
| Compute / CPU | Your CPU sits below 30% utilization running daily services. | You are actively running media transcoding (Plex/Jellyfin) or resource-heavy VMs that pin your CPU to 100%. |
| RAM | You have free memory headroom using swap space effectively. | Your host frequently hits Out-Of-Memory (OOM) errors due to running multiple heavy container stacks simultaneously. |
| Storage | You are hoarding duplicate files or uncompressed temp data. | You have maxed out SATA ports, require ZFS pool redundancy for critical data, or need dedicated high-speed NVMe arrays. |
| Networking | Your local 1GbE network transfers files faster than you consume them. | Inter-device backups bottleneck your network speed, or you are saturating gigabit links with heavy concurrent traffic. |
Conclusion: Skills First, Hardware Second
The core value of a homelab lies in the technical knowledge gained through building, troubleshooting, and maintaining services. Running a lean setup on spare hardware forces you to optimize system resources, write efficient configurations, and understand network security at a fundamental level.
Master these software stacks on your existing gear first. When you eventually decide to invest in dedicated server hardware, you’ll build an infrastructure that is intentional, secure, and fully aligned with your actual needs.