
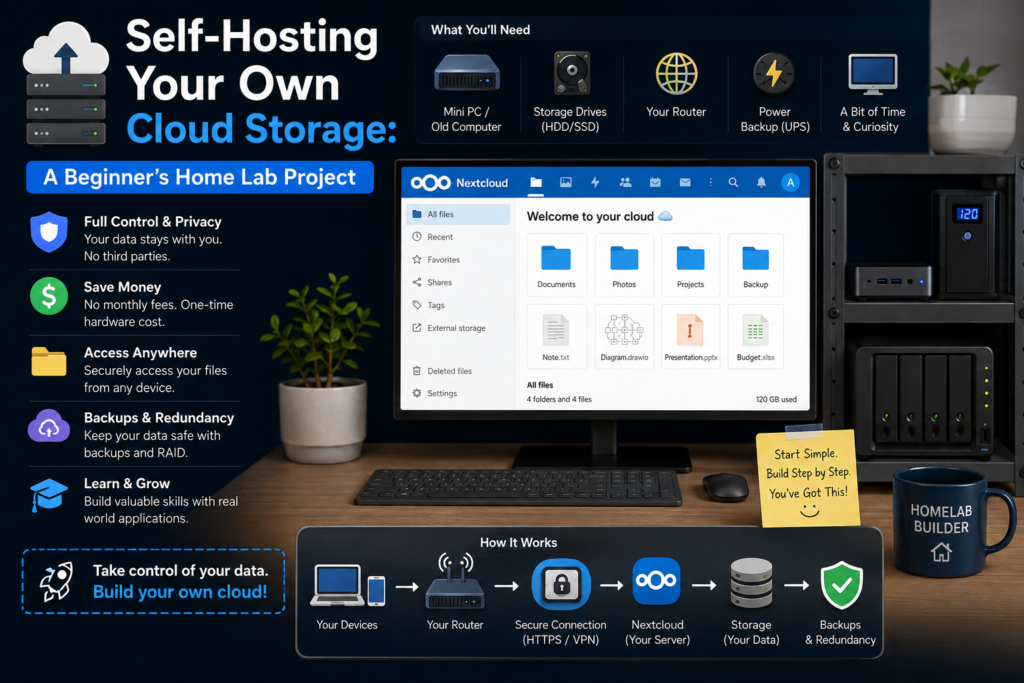
Taking control of your digital life often starts with one key shift: moving your files away from third-party tech giants and onto hardware you physically own.
Whether you are tired of monthly subscription fees, concerned about data privacy, or eager to dive into the rewarding world of home labbing, self-hosting your own cloud storage is the ultimate beginner-friendly entry project.
This deep-dive guide walks you step-by-step through setting up your own private cloud storage solution using Nextcloud running inside Docker, giving you Google Drive-like functionality accessible from anywhere—completely under your control.
Why Self-Host Your Cloud Storage?
Before touching a terminal, it helps to understand the core trade-offs of self-hosting versus public cloud services:
- Complete Data Sovereignty: Your personal photos, sensitive documents, and backups stay on your local storage drives—not on server farms owned by corporations.
- Zero Subscription Costs: Pay once for your hardware and drives. No sudden tier changes or monthly fees.
- Unlimited Customization: Expand your storage by swapping drives, adding custom streaming apps, or integrating automated back-ups.
- Privacy First: End-to-end encryption and custom access controls mean only you choose who sees your files.
Prerequisites & Recommended Hardware
You don’t need a multi-thousand-dollar server rack to start home labbing. An old laptop, a recycled desktop, or a inexpensive mini PC (like an Intel N100 box or Raspberry Pi 4/5) works perfectly.
Recommended Starter Specs:
- CPU: Any modern 64-bit x86 or ARM64 processor (2+ cores)
- RAM: 4 GB minimum (8 GB recommended for smooth preview generation)
- Storage: 1x SSD for your Operating System + 1x External/Internal HDD or SSD for raw file storage
- OS: Ubuntu Server 24.04 LTS or Debian 12 (headless/CLI mode)
Step 1: Install Docker and Docker Compose
Docker simplifies self-hosting by running services inside isolated “containers.” This means you won’t pollute your host operating system with complex dependencies.
- SSH into your home lab machine (or open its terminal).
- Update your package manager and install Docker with Compose support:
Bash
sudo apt update && sudo apt upgrade -y
sudo apt install docker.io docker-compose-v2 -y
sudo systemctl enable --now docker
- Verify Docker is running properly:
Bash
sudo docker --version
Step 2: Create Your Nextcloud Stack File
Nextcloud is the industry-standard open-source platform for self-hosted cloud storage. It handles file sync, mobile camera auto-uploads, user management, and calendar/contacts syncing.
To run Nextcloud reliably, we will set up a container stack consisting of Nextcloud (the app) paired with a MariaDB database (for metadata and performance).
- Create a directory to organize your home lab services:
Bash
mkdir -p ~/homelab/nextcloud && cd ~/homelab/nextcloud
- Create a file named
docker-compose.yml:
Bash
nano docker-compose.yml
- Paste the following configuration into the file:
YAML
version: '3.8'

services:
  db:
    image: mariadb:10.11
    container_name: nextcloud-db
    restart: always
    command: --transaction-isolation=READ-COMMITTED --log-bin-trust-function-creators=1
    volumes:
      - db_data:/var/lib/mysql
    environment:
      - MYSQL_ROOT_PASSWORD=ChangeThisStrongRootPassword!
      - MYSQL_PASSWORD=ChangeThisStrongUserPassword!
      - MYSQL_DATABASE=nextcloud
      - MYSQL_USER=nextcloud

  app:
    image: nextcloud:latest
    container_name: nextcloud-app
    restart: always
    ports:
      - 8080:80
    links:
      - db
    volumes:
      - nextcloud_data:/var/www/html
    environment:
      - MYSQL_PASSWORD=ChangeThisStrongUserPassword!
      - MYSQL_DATABASE=nextcloud
      - MYSQL_USER=nextcloud
      - MYSQL_HOST=db

volumes:
  db_data:
  nextcloud_data:
Security Note: Make sure to replace
ChangeThisStrongRootPassword!andChangeThisStrongUserPassword!with your own secure passwords before saving (Ctrl + O,Enter,Ctrl + X).
Step 3: Launch Your Private Cloud
With your configuration saved, deploying the entire stack requires just a single command.
- Start the Docker containers in detached (background) mode:
Bash
sudo docker compose up -d
- Docker will download the required images and launch the services. Once the terminal prompt returns, verify both containers are active:
Bash
sudo docker ps
Step 4: Complete Initial Web Setup
- Open a web browser on your personal computer or phone connected to the same home Wi-Fi/local network.
- Navigate to your server’s local IP address using port
8080:http://<YOUR-SERVER-LOCAL-IP>:8080(e.g., http://192.168.1.150:8080) - You will be greeted by the initial Nextcloud setup screen.
- Create your main Admin Account username and Password.
- Leave the database fields default (Docker Compose configured them automatically behind the scenes).
- Click Install / Finish Setup.
Within a minute or two, your dashboard will load, presenting you with a full-featured web drive interface!
Step 5: Connect Mobile & Desktop Apps
To make your self-hosted setup function just like commercial services:
- Desktop: Download the official Nextcloud Desktop Client for Windows, macOS, or Linux. Select “Log in”, enter your server URL (
http://<YOUR-SERVER-LOCAL-IP>:8080), and select a local folder on your computer to auto-sync. - Mobile: Download the Nextcloud App from iOS App Store or Google Play Store. Log in and enable Auto-Upload for photos to automatically back up your mobile camera roll to your local home lab storage whenever you connect to your home Wi-Fi.
Conclusion: Essential Next Steps for Home Labbers
Setting up Nextcloud in Docker gives you a rock-solid local storage foundation, but your home lab journey is just beginning. As you become comfortable managing your setup, consider these essential upgrades:
- Configure Secure Remote Access: To access your files outside your home Wi-Fi without exposing your server to public internet attacks, set up a zero-trust overlay network like Tailscale or WireGuard VPN.
- Automate External Backups: Remember the cardinal rule of homelabbing: Self-hosting is not a backup! Implement the 3-2-1 backup rule by periodically syncing your Docker data volumes to an encrypted external drive or offsite cloud bucket (like Backblaze B2 using Rclone).
- Add Reverse Proxy & SSL: Implement Nginx Proxy Manager or Caddy to route incoming traffic safely with free HTTPS SSL certificates via Let’s Encrypt.
Taking charge of your own infrastructure requires a learning curve, but the peace of mind knowing your data is completely yours makes every step worth it.
